In this article series I will dive in to one of the hardest parts of working with SharePoint (On-prem and Online): Sharing & Permissions! Part 2, that you are reading now, is about Permissions. I wrote these articles because questions about sharing and permissions are one of the top most asked questions I get from users, like this:
How can I see who has permission to a site and how do I change it?
Part 2: Permissions
Note: This article only concerns SharePoint Online, not on-prem.
You can create two types of sites in Microsoft 365*:
- Communication sites
With a communication site, typically only a small set of members contribute content that is consumed by a much larger audience. This type of site is often used as an intranet portal or a department’s public site where news & information from different areas are displayed. - Team sites
If you want to collaborate with other members of your team or with others on a specific project, a Team site is the better choice.
*Users with minimum SharePoint Administrator roles can also create a third type of site that is a Team site without a connected Microsoft365 group from the SharePoint admin center!
First an explanation of the permission models of the two site types above and how they differ from each other.
Permissions on Communication Sites
Communication sites aren’t connected to Microsoft 365 groups. They use the SharePoint permission model that has three default groups (more can be added if needed): Owners, Members, Visitors.
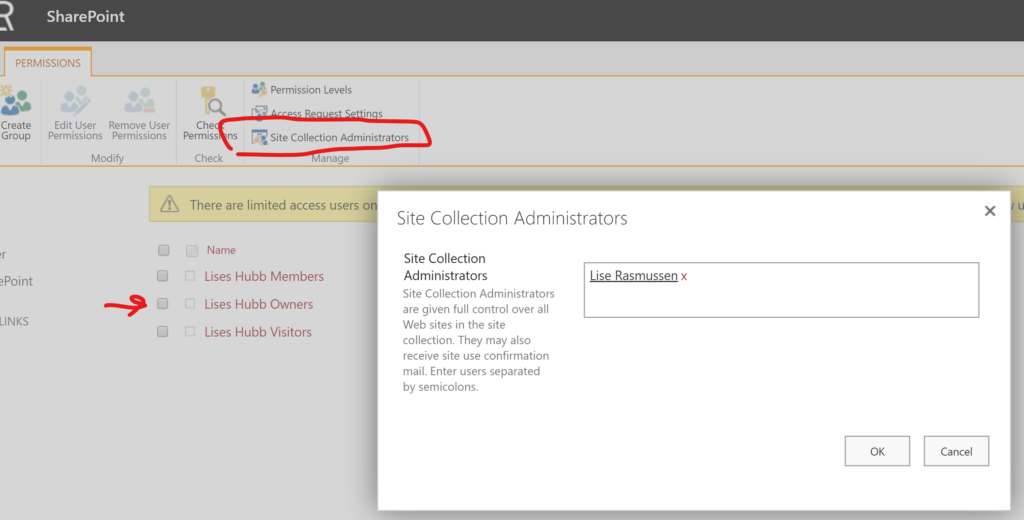
The person who creates the site is added to the SharePoint permission group Owner and as a Site Collection Administrator, see screen shot below:
The other groups are empty so the owner has to invite users to the site. Typically the owner invites “Everyone” as Visitors so they get read permissions to the site as these type of sites often are used in one-to-many scenarios like intranet portals etc. I always recommend to be more than one Owner, so that work on the site can be shared or if a person leaves the company the site will not be without an owner.
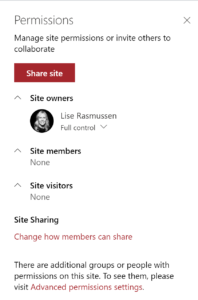
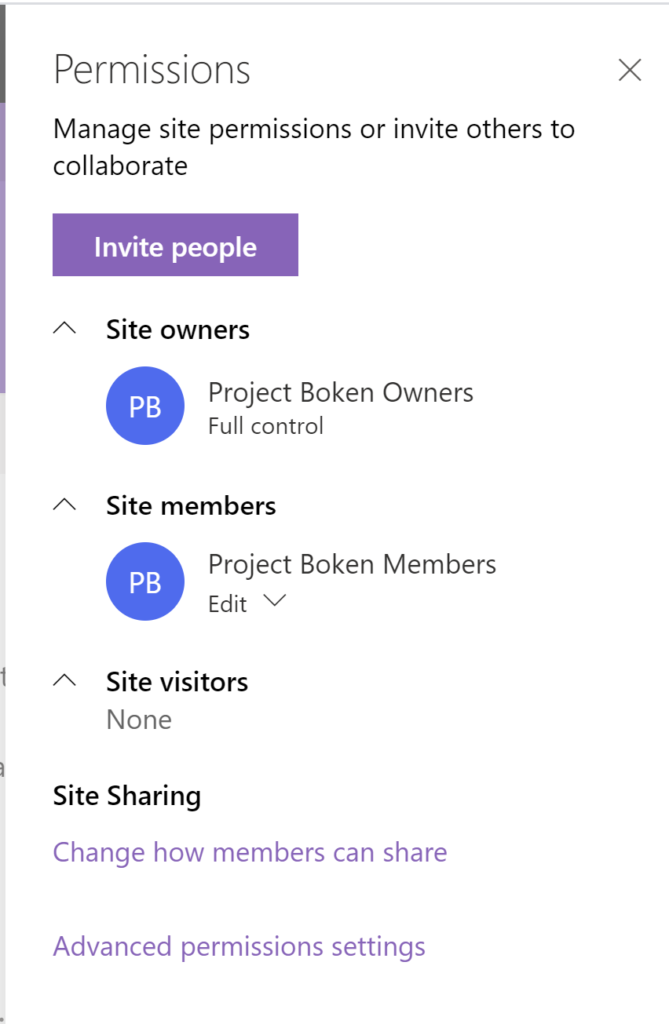
How can I see who has access to my Communication site?
Click on the Site Permissions and you will see the three groups Owners, Members and Visitors. BUT – and this is important to understand – if you create your own permission groups they are not displayed in this panel, then you must click on Advanced permission settings. On this site I have a fourth group with special permissions which is not shown here:
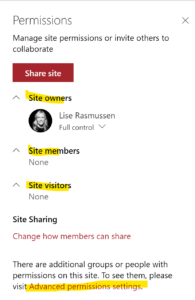
If you have created own permission groups on the site, they will not show up in the Site Permissions panel! You must click on “Advance permission settings” to see if there are any other groups added on the site. Important to know!
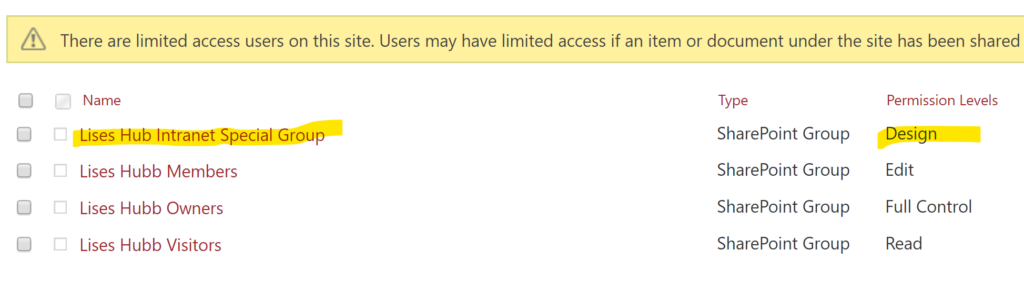
On Advanced permission settings we can see that other permission groups are added, and they might be added due to a need to have users with other permission levels. I would not recommend to do this because three levels should be enough, but users still do this so that’s why I want to show the options that are available on sites today:
What happens with the permission when I share the site?
First you must know that you can control how users can share the site. Click on “Change how members can share” link in the “Site permissions” panel. The default is that both Owners and Members can share content and site.
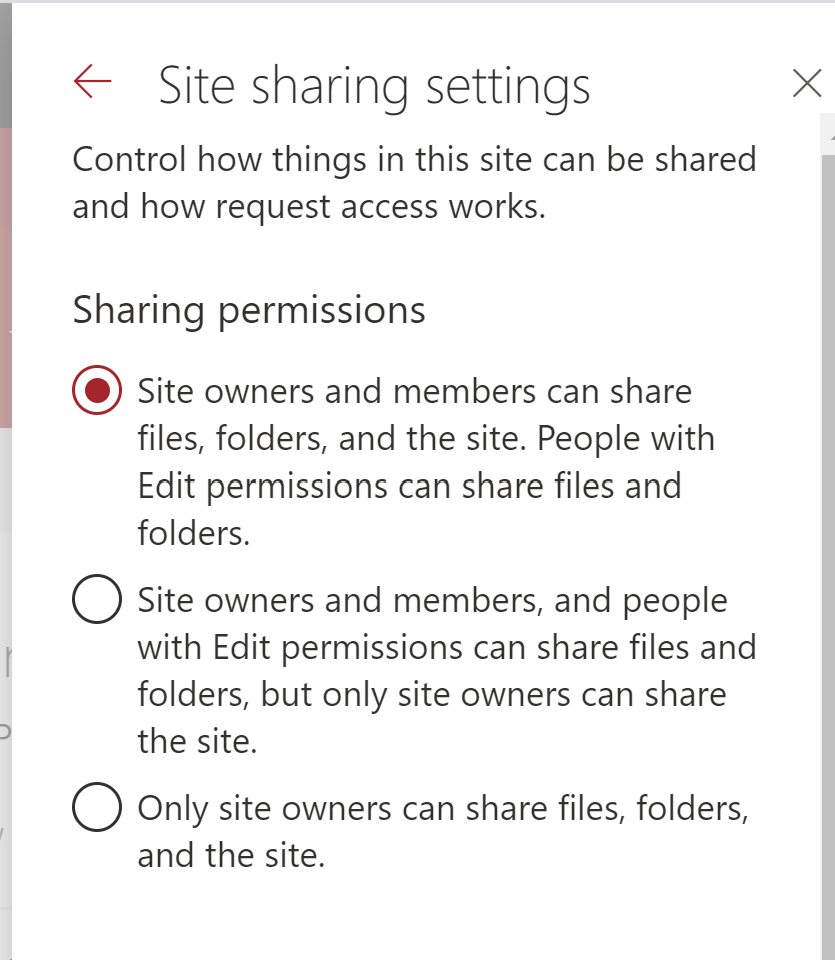
The default sharing settings are that Owners and Members can share site and content. How is that reflected on the site permissions?
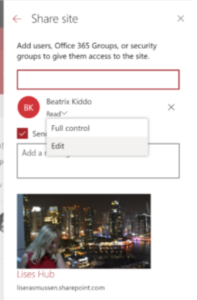
When you share the site, you choose what permission they should get before you send them the link. Then that user or AD group will be added into one of the three default permission groups.
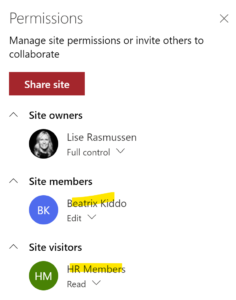
After they are added, click on Site Permissions and you will see that user or AD group you shared the site with, added into the respective groups. Note that you cannot add them into any of your own created permission groups.
Remove permissions
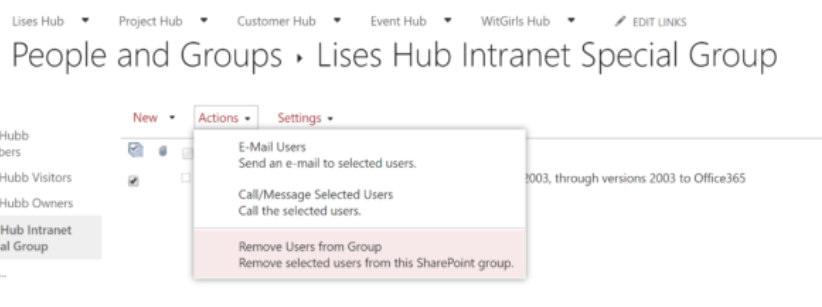
If you want to remove any users or AD groups from the Site permissions, then open the Site Permission panel, expand the group they are in, click on the arrow next to a user or group and choose “Remove”. To remove users from any of your own permission groups, you must go to Advanced permission settings and go into the group, select the user and choose “Remove users from Group” from Actions menu:
Permissions on Team Sites
Now I will describe how the permission model works on a modern Team Site. A lot of things happens when you create a Team site, that you must know: You are not only creating a site because Team sites are integrated with Microsoft 365 Groups and this is what you also get:
- A SharePoint site (the one you just created)
- A shared Outlook inbox
- A shared Calendar
- A Planner plan
- A OneNote notebook
- Power BI
- Yammer (if the group was created from Yammer)
- A Teams team (if the group was created from Teams or if you create it from the Team site)
When you give users access to this site, you also give them access to all of the resources above – IF you add them into the permission groups correctly, see how to that further below. You can also just share the site with them and then they will not get access to any of the resources mentioned above.
Let’s just start from what happens when you have created the new Team site. In this example, I skipped adding more Owners and Members when creating the site as I want to show how it looks default and I will add more users later.
Note how different this looks from the Communication Site Permissions. Here we get two M365 groups, Owners and Members. No Visitor group is added as it is a collaboration site and all users should be able to – at least – contribute to the site.
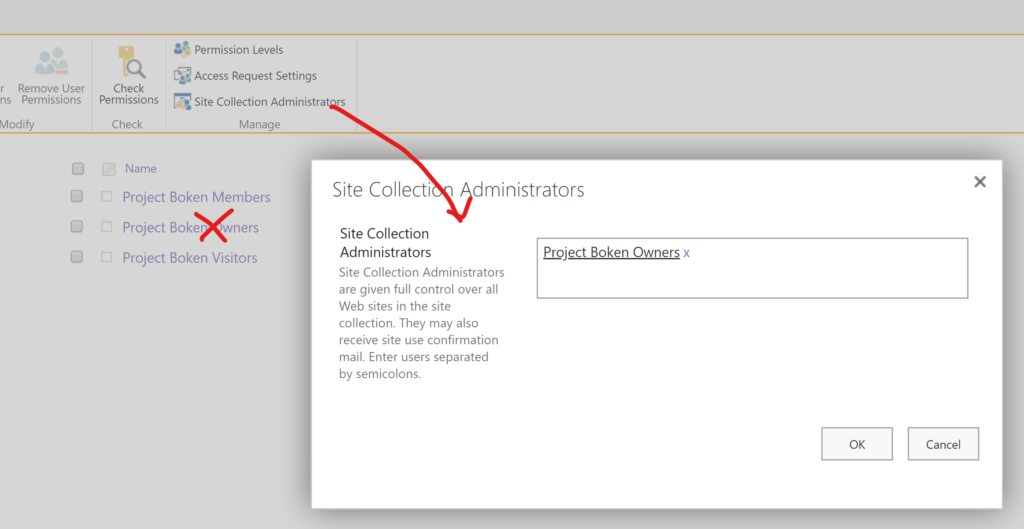
What is interesting is that the M365 Owner group is NOT added into the SharePoint advanced site permission Owners group (as it was on Communication sites)! That is empty. But the group is added into Site Collection Administrators:
How can I see the users in these groups?
If you want to see what individual users included in these groups, you can click on the “Member” icon on site:
To see what users are included in the groups, click on the Member icon on the site. This will show a list of individual users and their access:

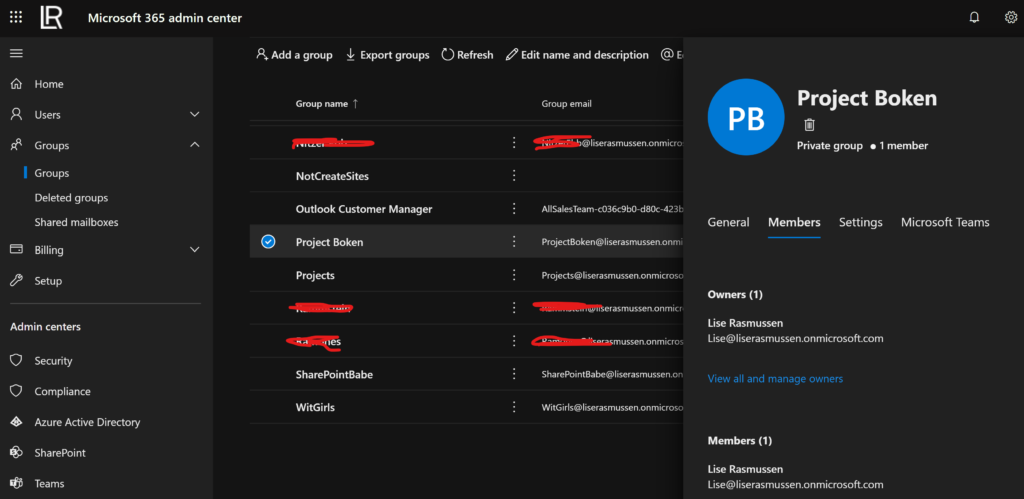
This list could get very long if you have many users in the groups, so a better way would be to visit the Admin Center and Groups to see the list there.
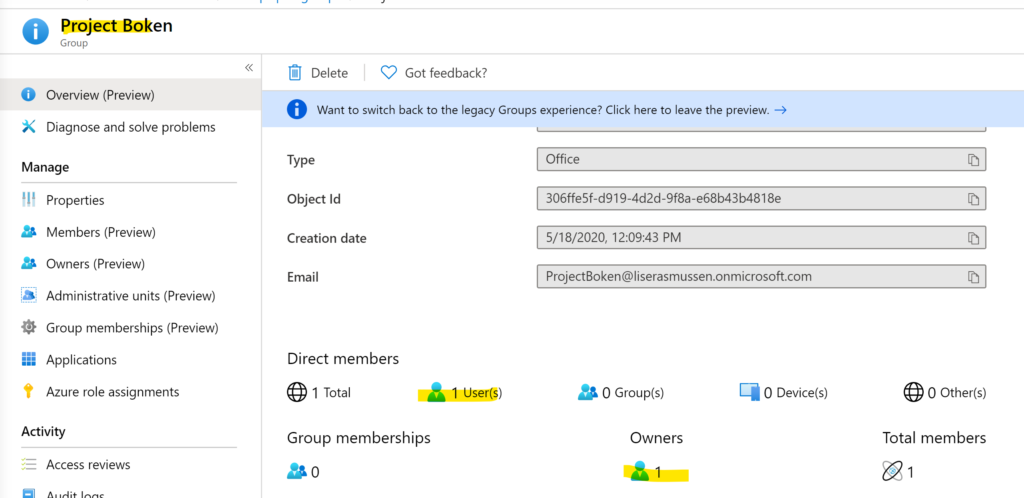
If you have access to the Admin Center, then click on “Groups” there to see users listed individually per M365 group. You can manage the groups from there too:
Microsoft 365 Groups are based in Azure Active Directory and can be managed using Azure Active Directory management tools, including dynamic membership. That means that if you set the department attribute to let’s say “Sales” on a user account, the user would get access to that M365 Sales group connected resources automatically.
You cannot see what users are included in the groups from the AAD, when you click on Groups. It will only show how many users each group contains:
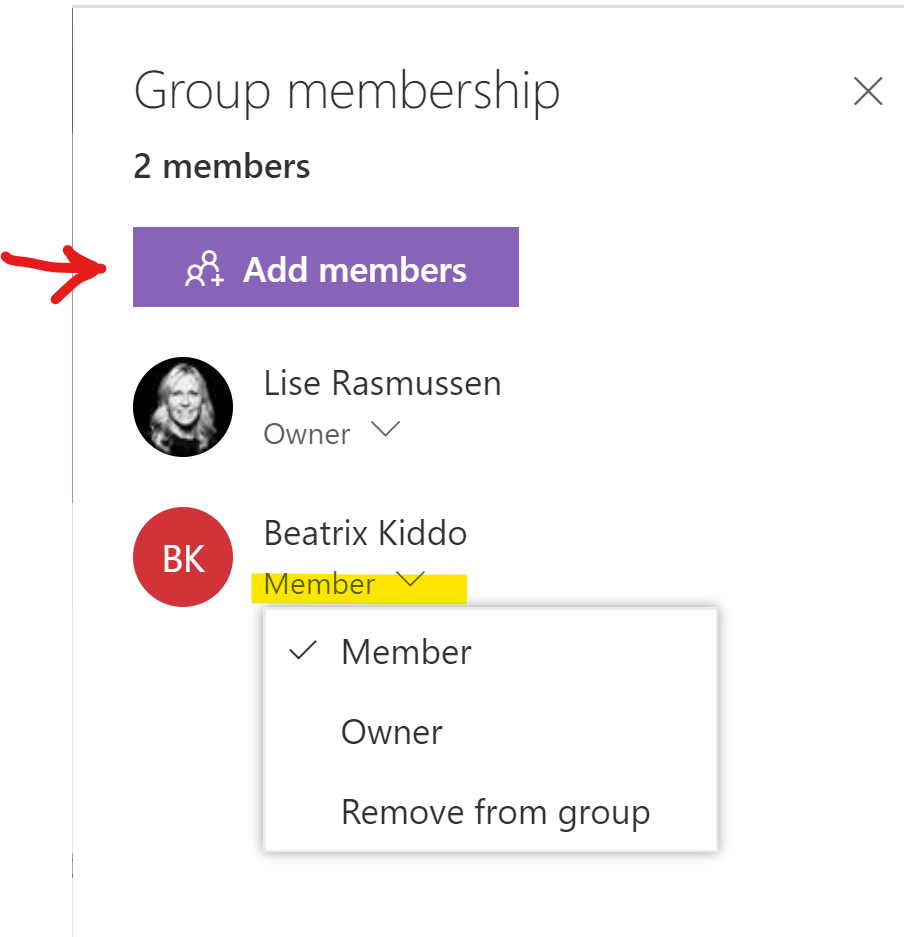
When you add an Owner or Member to an M365 Group, they automatically become an owner/member on your Team site as well. Easiest way to add more users to the M365 groups is to click on Site Permissions or the Member icon and choose what permissions they should get:
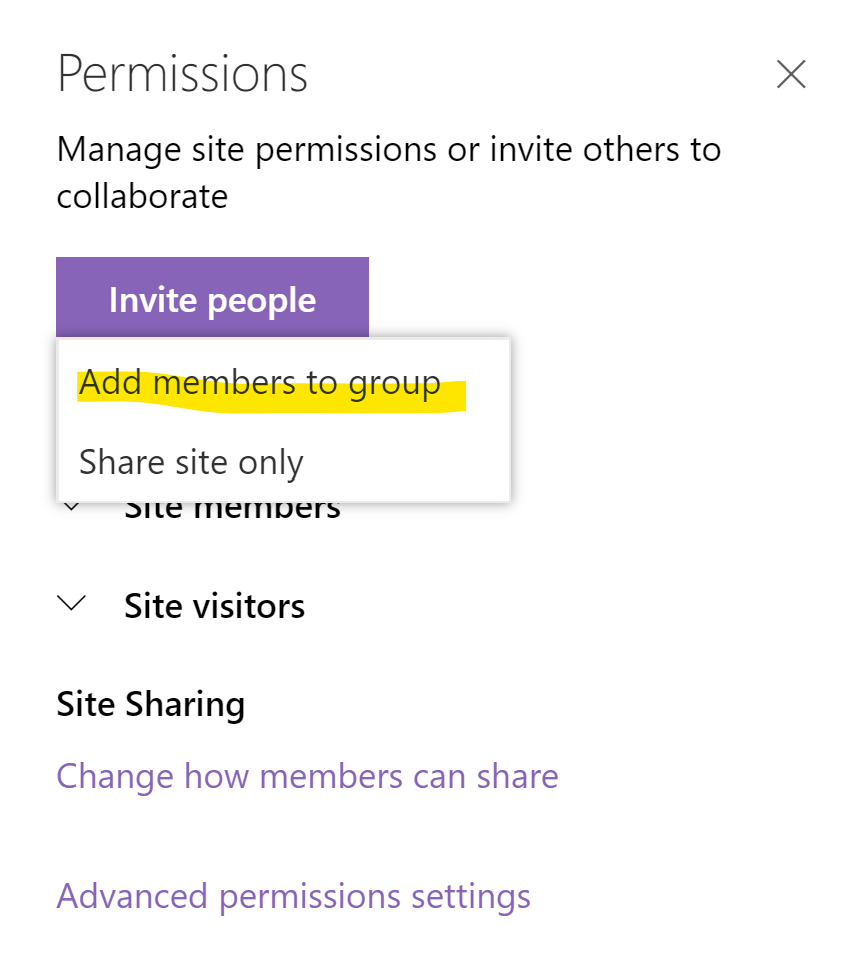
Click on the Site Permissions and Invite people button. Choose if they should get access to the M365 group and all connected resources OR only to the SharePoint site.
If you choose “Share site only” then it is an important difference to remember: adding users as owners or members to the SharePoint site only does not add them to the associated M365 group and connected resources! So they will not be able to visit the connected Teams team – if there is any. But sometimes you might only want to share the site with a user, for instance to share documents or other content on the site.
What happens if I add users to the SharePoint permission groups?
As mentioned above, the users will not get access to the other services included in the M365 group such as a Teams team, a shared mail/calendar etc. But you will see the users listed in the Site permissions panel:
When you only share the site with a user, they are not included in the M365 groups but listed individually in the permission section they have been given.
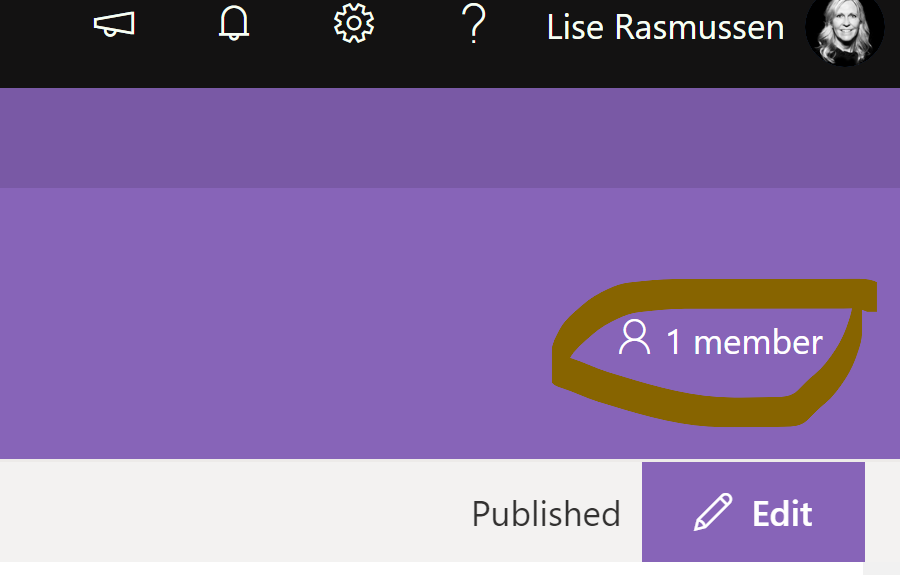
Note: This is tricky! Now the “Member” icon on the site says that there are 2 members…. But, I just added a third user and that user is not included in the count as they are not added into the M365 groups – but in the Site permissions. Very tricky and misleading! I have had to explain this to customers that was not aware that more users had access to the site.
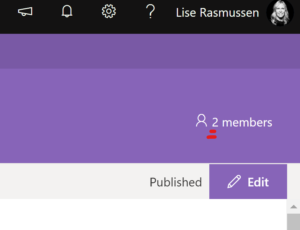
The Members icon says there are 2 members on the site, but there are 3!
What is even more risky is if you add your own SharePoint site permission groups, as they will not be displayed on the Site Permission panel or included in the Members count! To find them you must go to Advanced permission settings.
Item level permissions
If documents or items are shared on the site, the permissions are broken on those items. This is also something that must be explained to the site owners so that they are aware of the Sharing part and how to set that if they want to change it, read all about it in Part 1.
If you allow Members to share content, how can you see the users and their permissions on the site?
To see what has been shared with users outside of the Site memberships, then click on Site Permissions and then Advanced site permissions. Then in the yellow bar, if anything is shared, a message will be displayed “Some content on this site has different permissions from what you see here” and click the link “Show these items”. There you can see what content is shared and with whom. Note that this is NOT visible anywhere on the front side of the site, or in Site Permissions which makes it hard to know that content is shared:

Read Part 1 that is about Sharing >>
