This article is an overview of Microsoft Lists. It was launched in my tenant at the end of July 2020, it might still not be rolled out to your tentant depending on the settings you or your company/customer have – target or standard release.
What is Microsoft Lists?
Today Microsoft Lists launched in my tenant – or at least if you know where to find it ? The new Lists app icon was not visible on my office.com page, but someone tweeted that you could go to OneDrive and replace onedrive.aspx to lists.aspx and then Lists would launch! It did. I tried this new app out today and here are my first findings and impressions.

Note: If you don’t see an icon looking like this among your apps, then it might not be rolled out to your tenant yet or try the same as I did above by going to OneDrive and replace the last part of the URL to lists.aspx
About lists
Lists are something that has been a part of SharePoint forever, so the concept (or app) is not new. Lists are best used for storing data – not so much for documents. For example: if you have an Excel file that works more as a register, then you could easily transform that into a list. What you gain on doing that is:
- one single location for the list. It’s easier for people to find and edit the list as they all do it in the same place, which means: no new copies of an Excel file circulating! ?
- you can filter, sort and group the data in the list and save the views
- information such as who has modified an item and when it happened
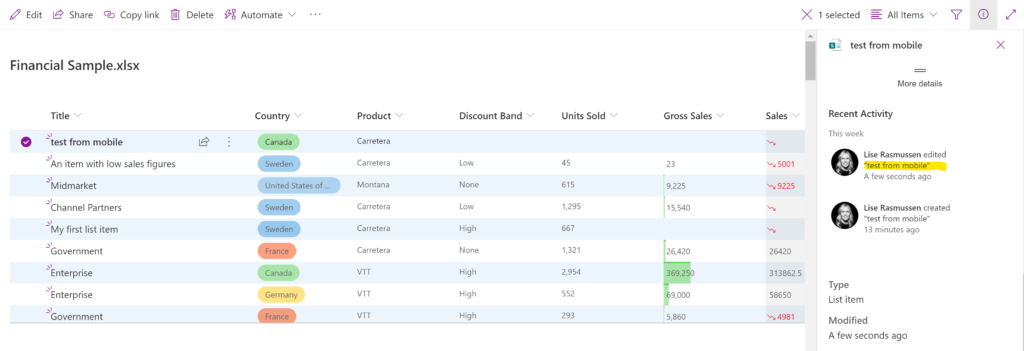
- enable version history! That you cannot do in Excel. This means that if someone edits a row (an item) in the list, a version is stored so that you can go back and see who has made a change and what they changed. If you change the value of any columns then that change is stored in the version history. Note: This is not on by default, you must go to List settings and enable it under “Version history”. The only thing that is enabled by default, on a modern list, is the Activity part where the i-panel shows information that someone has made a change to the item. But if you want to know exactly what they changed > enable the Version history. Below screen shot is of the default “Recent activity” that you get when selecting an item and clicking on the i-button:
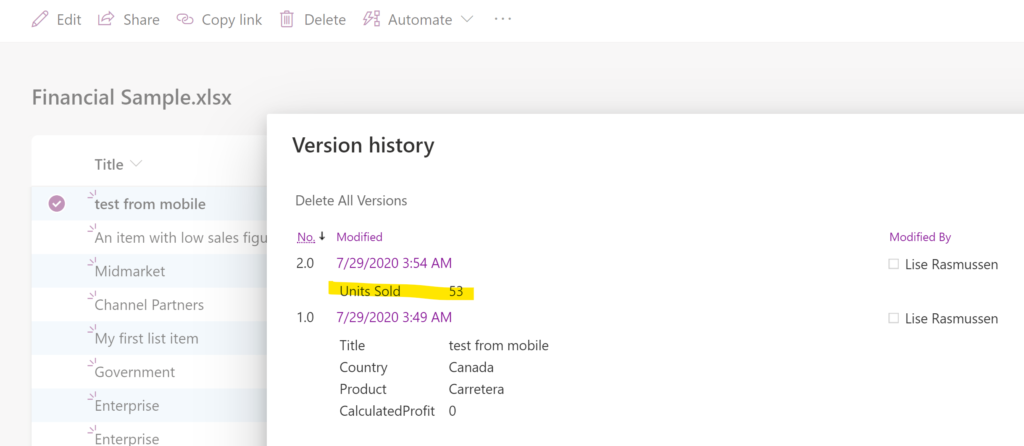
If you have Version history enabled, you will be able to see more detailed information like this:
Let’s find out how this new Lists app works then ???
Ok, so if lists already exist in SharePoint – why do we need a stand alone Lists app then? Well, now you can extend the usage and easily create lists from other places like in Teams, for a specific channel purpose and then share only the list instead of an entire site. They come with new richer formatting options, which you will see examples of here below. You can create personal lists or lists stored in SharePoint, as usual. A Lists mobile app will be launched later this year.
I like that Lists is an own app because you get a new home page where you can create, follow and share lists, there are nice new templates to choose from (or create from your own modern lists) and it’s just easy to get started building a new list! Remember that you still store them on either OneDrive or SharePoint, so they are not stored in the Lists app itself. And the lists on your SharePoint sites has the same new formatting options of course. The list web part shows the same formatting also.
The Lists App Home Page
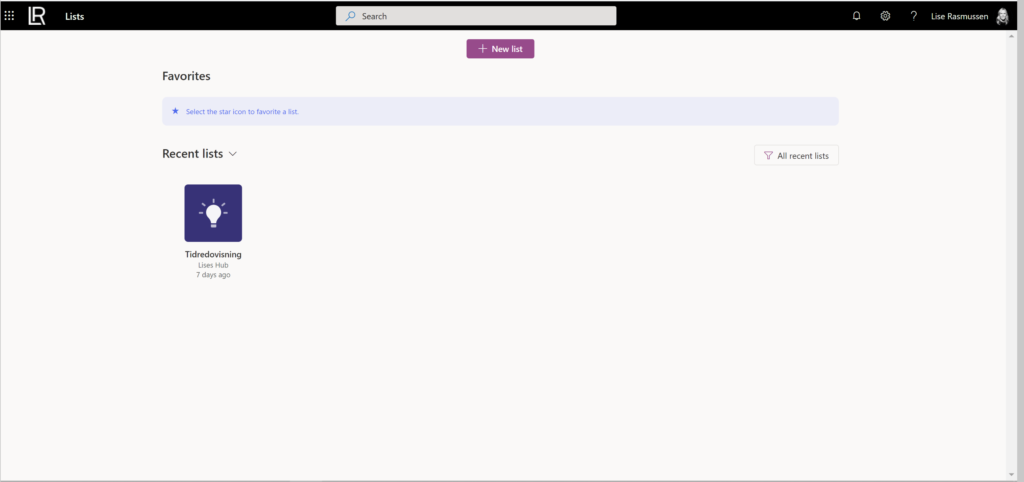
This is how the Lists home page looked when I launched Lists. My existing modern lists was displayed already. Click the arrow to the right of “Recent lists” to switch between:
- “Recent lists” which are all lists created by you on OneDrive, SharePoint sites or a Teams team
- “My lists” shows lists that are created on your OneDrive and they are your personal lists (that you can share of course):
On the home page you can create new lists, customize the list icons, share the lists, follow lists and remove lists (which only removes it from this page, it does not delete the list itself). To customize the list icons, hover a list and a menu appears. You can share the list in the same way you share documents or sites. Watch the short video below to see how it in action!
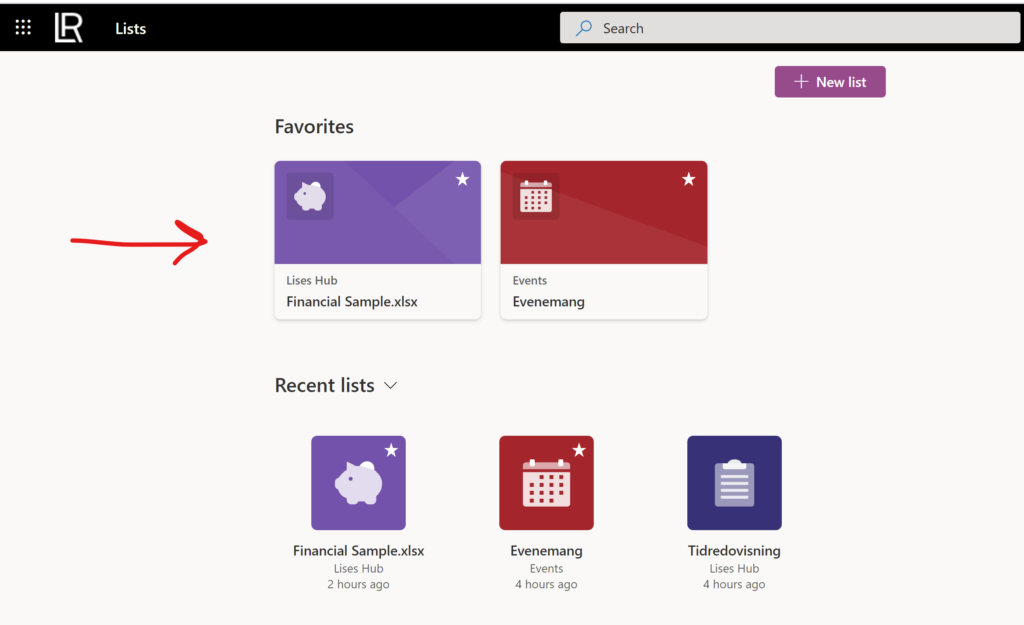
When you follow a list it shows up as Favorites on the home page:
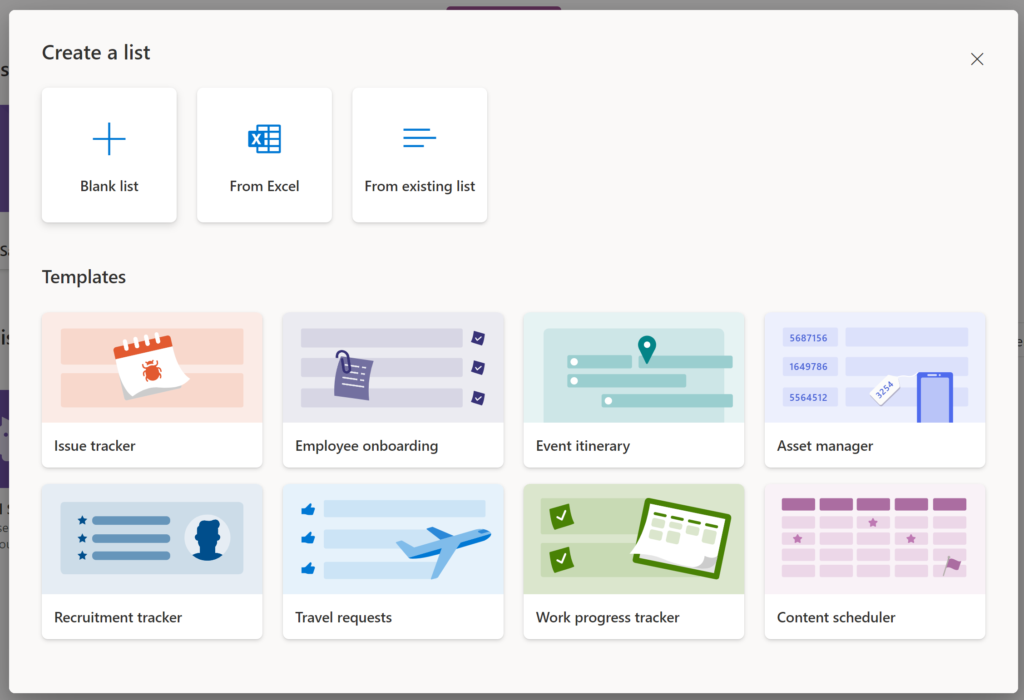
Create a new list
You can create a list from blank list, from Excel, from an existing list (modern only) or why not from any of the nice templates. For us who have worked with SharePoint since forever, this is super exciting! The formatting options, that you can add rules so easy, you can show/hide columns in the form, and to be able to choose a list template so easy – it is pure luxury compared to those boring ugly lists we are used to work with ?
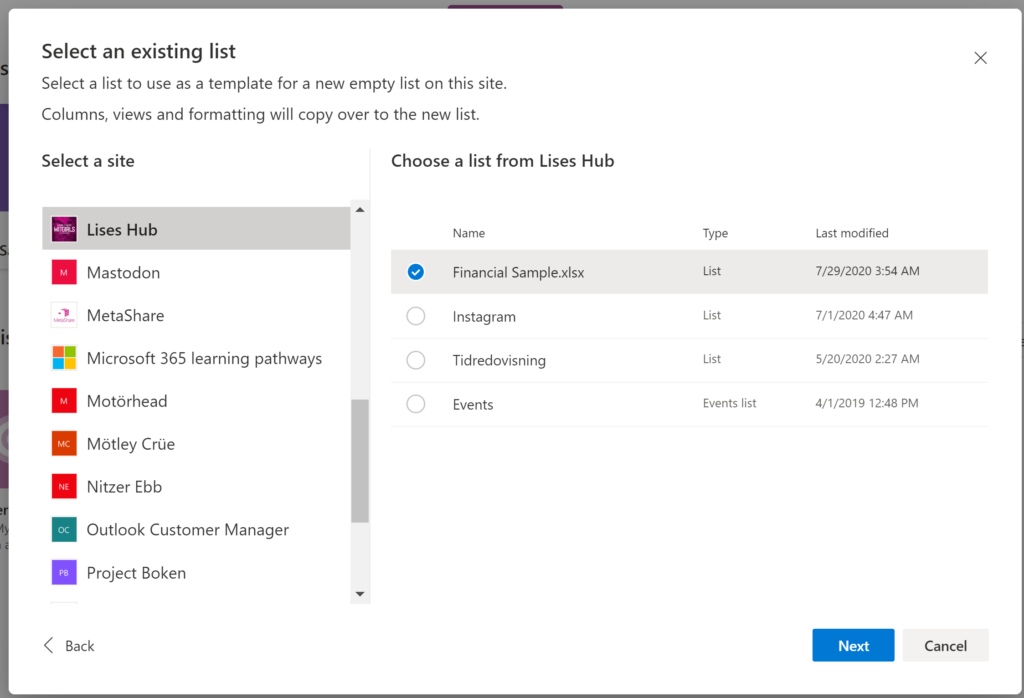
When you create a list “From existing list” you select from which SharePoint site and list to start from:
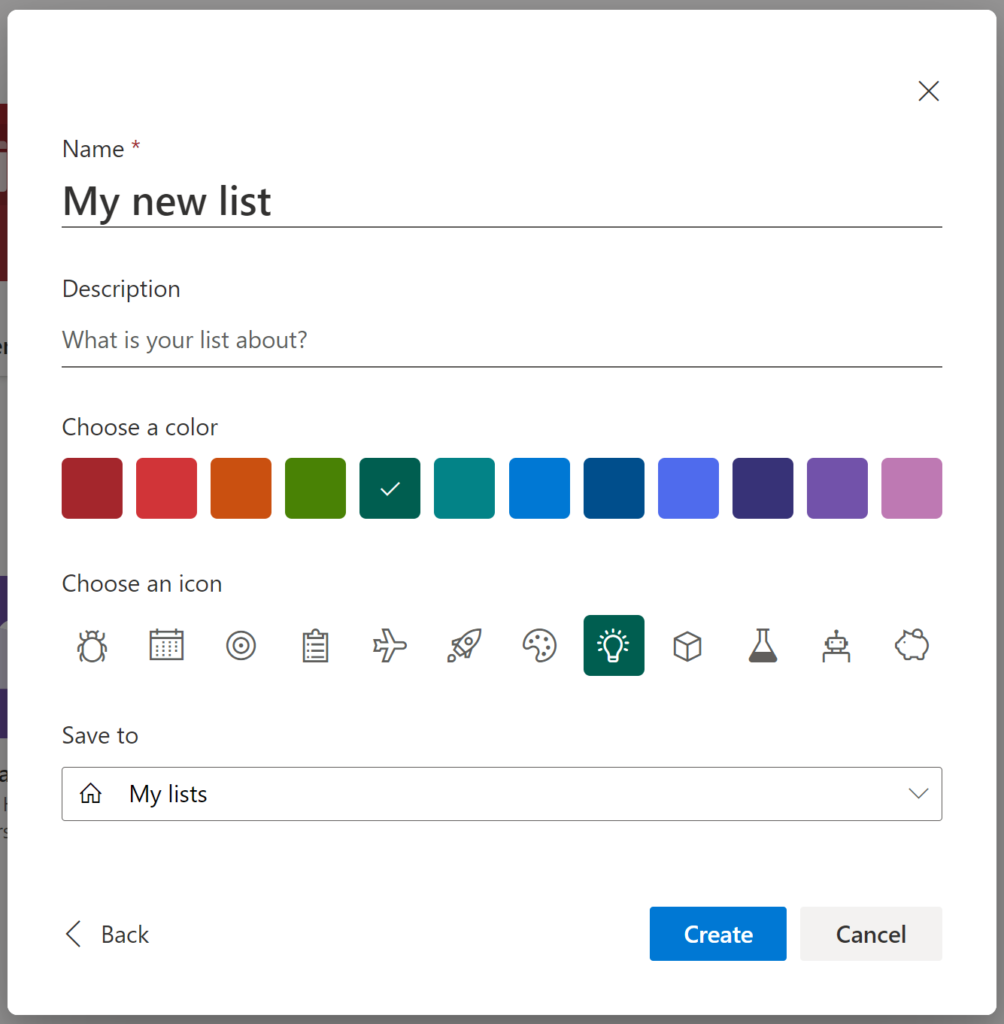
The next step is to add a Name, Description, color, icon and select if you want to save the list on your OneDrive or on a Microsoft365 connected group site, which is a SharePoint site.
If you choose from any of the templates you will get a preview of them before you create the list. They are just a start, you can always modify them as you wish afterwards. Watch the video below to see the new templates:
In the following example I will create a list from Excel. Note: the file must be stored either on your device or OneDrive (it does not support from SharePoint.. yet?). Also, the Excel file must contain a table. Before you import the data you can click on the column headers to choose what type of column they should be. For instance, a Text or Date or Choice column. Watch this short video on how to do it:
Working with lists
The first thing I noticed when opening a list in this new app was the full sized window! ? Super nice to not have that quick launch on the left hand side, but instead give good space to work with the list and all columns.
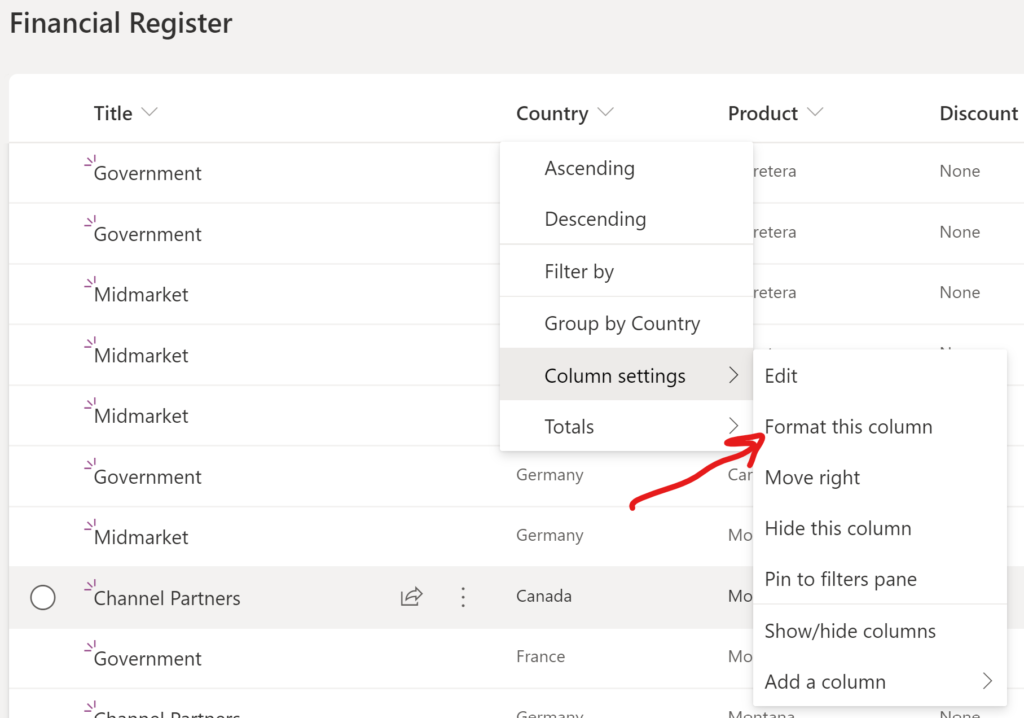
Once the Excel data is imported, you can choose to re-format the columns to any other type by clicking on the column and “Column settings” > “Format this column”:
Again, for us who have worked with lists for many years, this is also pure luxury! To be able to format the columns this easy with colors, fonts, conditional rules, data bars and more – it’s amazing! ❤️ Watch and learn:
When I imported the table I changed some of the columns to be of type “Choice” which is a great option if the users should choose a value rather than typing it (helps avoiding misspellings and misunderstandings on what the column should contain) but the choices were not added. To do this afterwards, click the column header and “Column settings” > “Edit” where you also set if the column is mandatory, empty, prefilled etc:
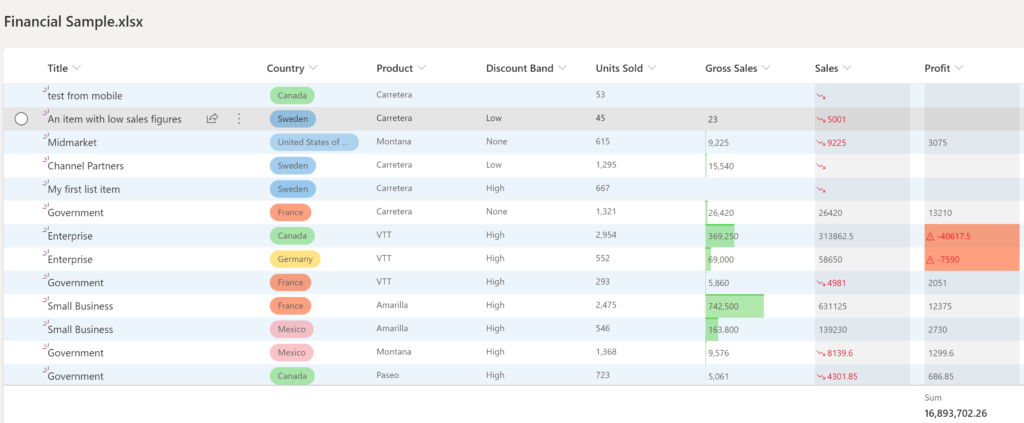
This is a financial register so it is interesting to get a column total for some of the columns. Click on the column header again, “Column settings” > “Totals” and the value is displayed at the bottom of the list:
When I was ready formatting my list, it had transformed from a boring white list to a colorful register with columns that speaks their own message:
Customize the form
One of the favorite news with lists is the options to edit the form! You can show/hide columns, change the order of them directly from the form. If you will use it? The new Quick Edit view is so much nicer to work with and it maintains the formatting when you edit, so maybe it’s overkill to modify the form – unless you want to publish the list to devices, then it might be useful. But here is how you customize it in the browser:
Quick Edit
Instead of edit an item one by one, use Quick Edit! Then you can jump between the cells in the list, just like in Excel. It will autosave the change as soon as you leave the cell, so you can work fast and easy in this view. Even the formatting is maintained so it looks the same in both views. It also loads up to 100 rows now.. ? Amazing!
PowerApps and PowerAutomate
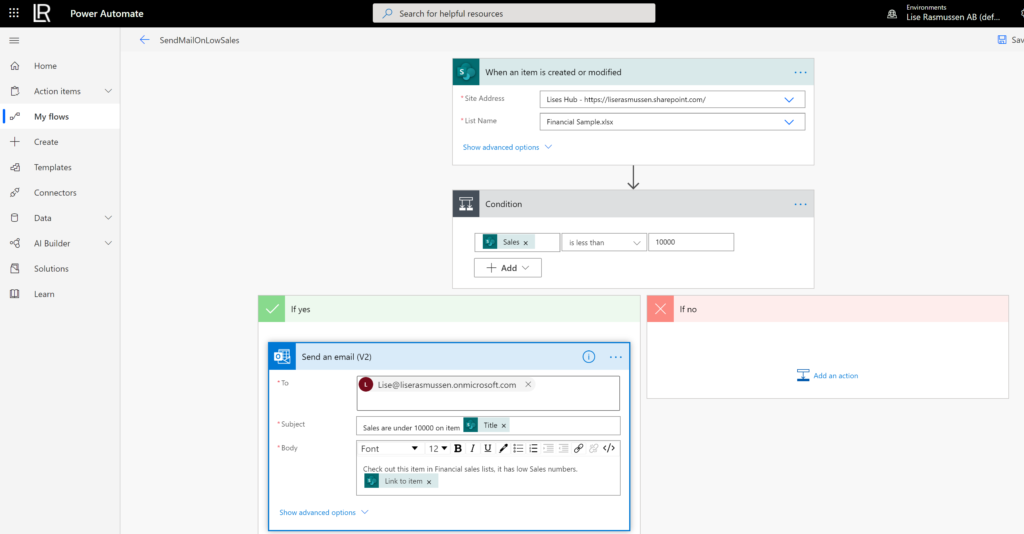
You can modify the form and list using PowerApps. And use PowerAutomate for things like approval, notifications etc. I setup an easy flow that sends a mail to me if “Sales” is under 10,000.

The rules looks are super easy, and this is my notification flow:
Lists on the mobile
How does this look on a mobile phone then? Two different scenarios:
1) If you add the list web part on a page, then the formatting shows
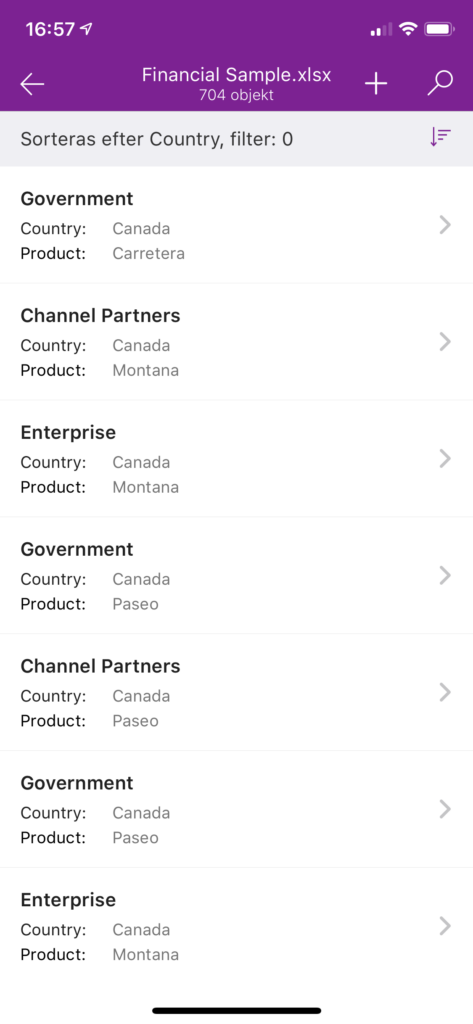
2) If you go to “Site contents” and open the list from there, it’s in the “vanilla” format as you can see on this screen shot on the left.
Lists in Teams
Since the Lists app is not yet really rolled out to my tenant, then it’s not available yet in my Teams client unfortunately. I just have to wait for the Lists app to show up as a standard app in my tenant. Will be back with a new article as soon as it’s released.

Great article! This looks easy and interesting. Just have to wait for it to come to us 🙂